

Contributed by Barry Taheri
Problems Caused by a Leaky Foundation
“Do it right the first time.” It’s almost a cliche. But when it comes to waterproofing concrete, not doing it right the first time can have truly disastrous results. A leaky foundation in a residential building can damage finishes and furnishings, even the structure itself. In a commercial building, water can ruin expensive equipment and disrupt vital work. It all adds up to lost money, wasted time, upset customers and sometimes litigation.
The Problem with Damp-Proofing… It Won’t Stop Water Bearing Against the Foundation
Waterproofing isn’t pretty, and since it’s going to get buried anyway, it’s easy to skimp and go for damp-proofing instead, painting on that old black stuff that comes in a bucket. But damp-proofing will only retard moisture; it can’t stop a head of water bearing against the foundation.
Nearly all waterproofing products can be applied to concrete block as well as poured concrete walls, and most of the same concerns and practical tips are relevant.
Choosing Waterproofing Concrete Products
There are many below-grade waterproofing products on the market. Most manufacturers require you to become a certified applicator before they will guarantee an installation. If you’re just going to do occasional waterproofing, I suggest you choose one product, get certified by the manufacturer, and learn all about that one product. Eventually you’ll get good at applying it and be able to work quickly and safely. Different products can have very different characteristics, so only specialty waterproofing contractors should try working with multiple products.
Because there are so many materials on the market, any waterproofing job should begin with a careful review of the manufacturer’s literature, maybe a phone call to a technical service representative, and possibly even a site visit by a field representative.
Liquid Membranes
You apply a liquid membrane by spray, roller, or trowel. The liquid cures into a rubbery coating on the wall. One manufacturer has a spray-applied liquid membrane composed of polymer-modified asphalt. Polyurethane liquid membranes in separate grades for trowel, roller, or spray are also available from various manufacturers.
Watch application procedures carefully.
The manufacturer probably has a special procedure for treating voids, form-tie holes, and joints. At the wall-footing joint, you may be required to use cement or other trowel-grade material to form a “fillet” (radius or cove) before applying the overall coating.
Liquid coatings have the advantages of quick application, low in-place cost, and excellent elongation. One of the chief disadvantages is the possible inconsistency in coverage. The typical application thickness is 60 mils, but it takes a careful applicator to be sure of always achieving that minimum coverage.
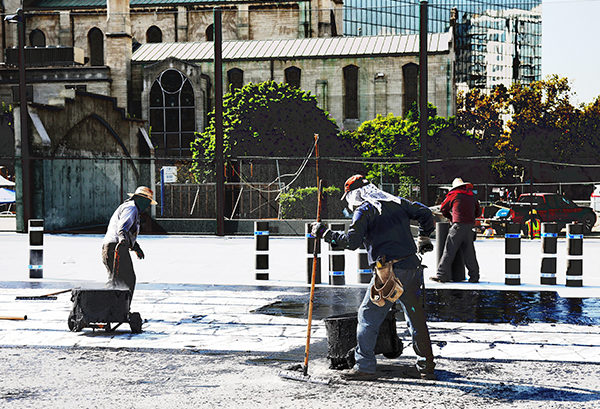
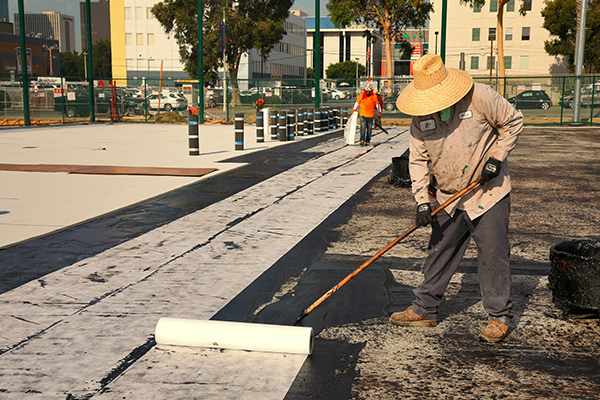 Sheet Membranes
The most commonly specified sheet materials are self-adhering rubberized asphalt membranes. These 60-mil-thick membranes are composed of rubberized asphalt laminated to a waterproof polyethylene film. The asphalt side is incredibly sticky but is covered by a release paper, which you remove during application.
The first time you work with this material, it’ll drive you crazy because it sticks to everything. But you’ll be surprised how fast you can move with it once you develop a rhythm. It takes two people, one on top to smooth it out and stick it down, the other on the bottom to pull off the paper. You’ll have many details to learn about surface preparation, priming, patching, joint treatment, terminations, lap joints, penetrations, and corners.
Because they’re so sticky, these membranes can be pretty unforgiving. Once a piece is down, you won’t get it back up again at least not in reusable condition. However, the system allows easy repairs of holes, fishmouths, puckers, and wrinkles. You’ll patch holes or damaged areas with a piece of membrane placed right over the first layer. With a fish-mouth or wrinkle, all you do is slit the raised area, press it down flat, and cover it with a patch.
A chief advantage of sheet membranes is their consistent thickness. Because they’re manufactured to exacting tolerances, you can be sure of the 60-mil coverage. These membranes also have good elongation.
A higher in-place cost is one of the main disadvantages of sheets. The cost of the material itself is likely to be greater on a square-foot basis than the liquid membranes. Labor cost is also higher, because of all the cutting, handling, reinforcing, and detailing you have to go through during installation.
Not everyone agrees, however, that sheet membranes lessen the quality-control risk. A rubberized liquid forms a continuous, seamless coating, whereas a sheet membrane results in many seams, with the potential for a poor seal. If you’re applying these materials, make sure your lap joints are tight and properly detailed. Make correct use of the manufacturers mastic or other accessories. For example, one manufacturer requires you to apply a bead of mastic to every lap joint within 12 inches of a corner when using its product.
 Cementitious Waterproofing
Cementitious products are probably the easiest waterproofing materials to use. They’re readily available from suppliers of masonry products, and they’re easy to mix and apply. If you plan to use this material, a long-handled brush will make your life easier. Also, spend the extra money to buy acrylic additive (a white, milky liquid) to mix in with the cement product. You’ll get better bonding and a more solid, durable coating.
The chief disadvantage is that cementitious products have no give to them probably because cement just doesn’t stretch to any degree worth mentioning. They will stand up fine to a head of water, but will tolerate almost no joint or crack movement.
Concrete Waterproofing Built-up Systems
When I first went into the waterproofing business, I did a number of jobs with a hot-mopped, asphalt-and-felt built-up system. With these systems, you first apply a concrete primer. You then mop on a coating of hot tar (which is heated in a large asphalt kettle), followed immediately by application of a sheet of perforated felt, extending the system right out onto the footing. You keep staggering the felt sheets until you have three layers of felt with a final coating of tar. (The local building code may let you get by with only two plies.)
This is a good system with a lot of strength, but probably not much elongation ability. You can produce a similar built-up waterproofing system using cold, trowel-grade dampproofing and reinforcing fabric. Again, this system has some strength but little elasticity.
Bentonite
Sodium bentonite, a clay material, has enjoyed a steady upsurge in popularity over the past several years. In panel form, bentonite has become the choice of a growing number of architects and builders. Bentonite works because it can absorb a tremendous amount of water. As it takes in water, the clay swells to 15 times its original volume and pushes itself into cracks and voids. When it reaches its maximum volume, it stays in these areas permanently to seal against water. One firms panels are 4×4-foot corrugated cardboard with clay particles held within the flutes of the cardboard. The panels can be nailed, fastened with a powder-actuated tool, or simply laid in place for horizontal applications.
Some waterproofers are nervous about using bentonite panels. With other products, you can inspect the finished waterproofing application and confirm the integrity of the seal before backfilling. With bentonite panels, the seal doesn’t form until the foundation is backfilled and water reaches the panel. Suppose something goes wrong? It’s a nagging question for “traditional” waterproofers.
Bentonite has its advantages, however: It’s safe to work with, non-polluting, easy and quick to apply, and can go on even at low temperatures. One company makes a sheet membrane that uses a compound of bentonite and butyl rubber.
Surface Preparation
Don’t skimp on surface preparation. You must get the foundation wall and footing clean, free of loose material, and fairly smooth. Do as much as you can ahead of time: Once you start waterproofing, rhythm is crucial, and you don’t want to have to stop to scrape loose concrete from the footing or break off a form tie.
Waterproofing materials aren’t designed to cover large voids or honeycombs. You’ll need to fill these, preferably with nonshrink grout or a good patching cement. You may be able to patch form-tie holes or smaller voids with trowel-grade mastic. Check the manufacturers instructions to make sure that whatever material you use for patching is compatible with the waterproofing product.
 Surface Preparation Procedure
Waterproofing likes a clean wall. Here’s what I recommend for a surface preparation procedure:
Survey the entire surface to be waterproofed. Identify special problems, such as water on footings, concrete forms not removed, footings not dugout, and pipe penetrations not prepared. Have these problems worked on right away, especially if these areas are the responsibility of another trade.
Dry off all footings. A big propane torch with a 20-pound tank is good for this. For puddles, sweep standing water off with a broom, then dry the damp spot with the torch.
Remove concrete form ties. If there’s an odd form tie that wasn’t aligned properly and won’t break off flush, cut it off with a cutting torch or reciprocating saw. Break form ties off on the inside of the foundation too. Another waterproofer once told me that on one of his jobs the general contractor sent in a laborer, after waterproofing was applied, to break off form ties on the inside of a foundation. The laborer decided it would be easier to just pound the ties back into the wall. Every one of them punched through the waterproofing membrane on the other side, which was already backfilled.
Scrape off excess and loose material from walls and footings. A long-handled ice breaker is good for this. Some waterproofing manufacturers will require you to machine-grind any ridges or protrusions before applying their products. It’s good to have a brick hammer on hand, too. Pay special attention to the footing. Quite often, puddles of congealed slurry form on the footing when the wall is poured. This material doesn’t have the full strength of concrete, it isn’t bonded to the footing, and should scrape off easily.
Sweep off the walls and especially the footings. They don’t have to be clean enough to eat off of, but don’t leave a film of dust or mud. Waterproofing materials won’t stick to a dirty surface. Keep other trades and workers out of the area. Besides the safety hazards, other workers tend to be oblivious to what waterproofers are trying to accomplish. Many times I’ve cleaned a footing, only to see a muddy-booted laborer stride right down its length, leaving tracks the whole way.
Take care of any patching or filling. Grout around penetrations and follow any other instructions from the waterproofing manufacturer that apply at this point.
Scheduling and Planning For Concrete Waterproofing
 Allow considerable float time for waterproofing. If you’re using a waterproofing subcontractor, recognize that good waterproofers can be in high demand during the busy season. Rain can also delay waterproofing work.
Plan the layout of waterproofing well ahead of time. The plan elevations will likely show the finish grade line on the foundation walls, but these lines should be confirmed with the architect, if necessary.
You don’t want black, gooey waterproofing showing above grade. Watch for changes in the level of grade. A line of waterproofing descending at a diagonal from one level to another won’t work if the architect has decided to handle the change with a retaining wall.
Construction Tips
Ideally, you should mark layout lines with a crayon or chalk line, especially on a complex foundation with varying grade. On a simple foundation, it might be safe to just instruct the waterproofer to keep his work so many inches from the top of the foundation. I like to see waterproofing as close to finish grade as possible, but no lower than 6 inches in any case. Don’t leave form-tie holes that are below grade unprotected. Work out ahead of time what you’re going to do at basement windows and bulkheads, porch foundations, and intersecting walls that don’t have to be waterproofed.
When deciding what walls get waterproofed, follow this basic rule: Waterproof any foundation wall that has earth on one side and usable space on the other, including crawl spaces. Extend waterproofing at least 12 inches onto intersecting walls that don’t have to be waterproofed. You might want to continue the waterproofing on other walls if it’s a very wet site. Under extreme conditions, water has been known to travel through the keyway along the footing and into occupied space. Consult with the architect if you have any doubts.
Check the waterproofing manufacturers literature for temperature limitations. You’re probably okay applying waterproofing on a cold day if you’re working with a solvent-based material. But watch out if your material is water-based. The lower limit for some products is 40F.
Waterproofing Curing Time
Likewise, check the manufacturers requirements for concrete curing time. For every sheet membrane I know of, concrete must be cured a minimum of seven days before membrane application, sometimes even longer. This is because the concrete will continue to dry long after it’s poured. The water vapor escaping from the concrete can prevent the waterproofing material from bonding. Concrete curing times for liquid membranes also vary considerably. Some require 14 days or longer. Others can be applied as soon as the forms are removed.
Protecting In-place Waterproofing
Most waterproofing systems need protection during backfilling. Some manufacturers have their own protection board for this purpose. A drainage mat or insulation can also function as protection board. An inexpensive 1-inch-thick expanded-polystyrene-foam board works fine as a basic protection course. However, one manufacturer has a protection board that functions as insulation, protection board, and drainage medium in one.
When adhering protection board, make sure to use an adhesive that’s compatible with the waterproofing membrane. I’ve seen some adhesives eat right through waterproofing material. Besides providing protection during backfilling, you should protect waterproofing work that is in place from damage by other workers and trades. Keep workers from tracking across exposed membranes on footings, decks, or other horizontal surfaces. Don’t expect others to be as sensitive as you are to the importance of waterproofing.
Don’t Neglect Drainage When Waterproofing
No waterproofing system I know of is designed to work without proper drainage. Without relief, water can build up tremendous pressure underground. A waterproofing manufacturer won’t warrant its product if drainage is missing or inadequate, or if the structure is built on a site where proper drainage is impossible.
The minimum drainage for any building is a perimeter footing drain. Depending on conditions, some buildings will require an underdrain system or a sump pit with a pump.
Waterproofing Safety
Waterproofing below grade can be dangerous. Because of the hazards, it’s usually not a good idea for anyone to waterproof alone. If you’re using a water-proofing subcontractor, make sure workers follow a written safety program and comply with hazard-communication requirements. Keep other trades and workers well away from the waterproofers work area.
Once you learn how to work with waterproofing materials, you can make good time without sacrificing safety. Here are some primary safety concerns that go along with waterproofing.
Flammable materials: Many waterproofing products are solvent-based. Keep fire, smoking materials, welding operations, cutting torches, and other sources of ignition well away from the area.
Respiration hazards: Use the manufacturer-recommended respirator, especially with solvent-based materials. In a close area, you might need an air-fed respirator. Don’t be complacent about this. Solvent vapors are deadly, and a large surface area of newly applied material can put out a lot of vapor. The vapors are usually heavier than air, so they tend to build up in a sunken area like a foundation excavation.
Skin injuries: Waterproofing materials can contain all sorts of chemicals that can harm your skin. As needed, wear protective clothing and gloves. When cleaning tools in solvent, wear chemical-resistant gloves.
Injection hazards: Take precautions when working with or around spray equipment. A high-pressure airless sprayer can inject toxic chemicals directly into your blood-stream.
Eye injuries: Wear protective glasses or goggles as needed, especially when working with liquids.
#####
If you should have further questions, do not hesitate to contact Barry Taheri or call our office.